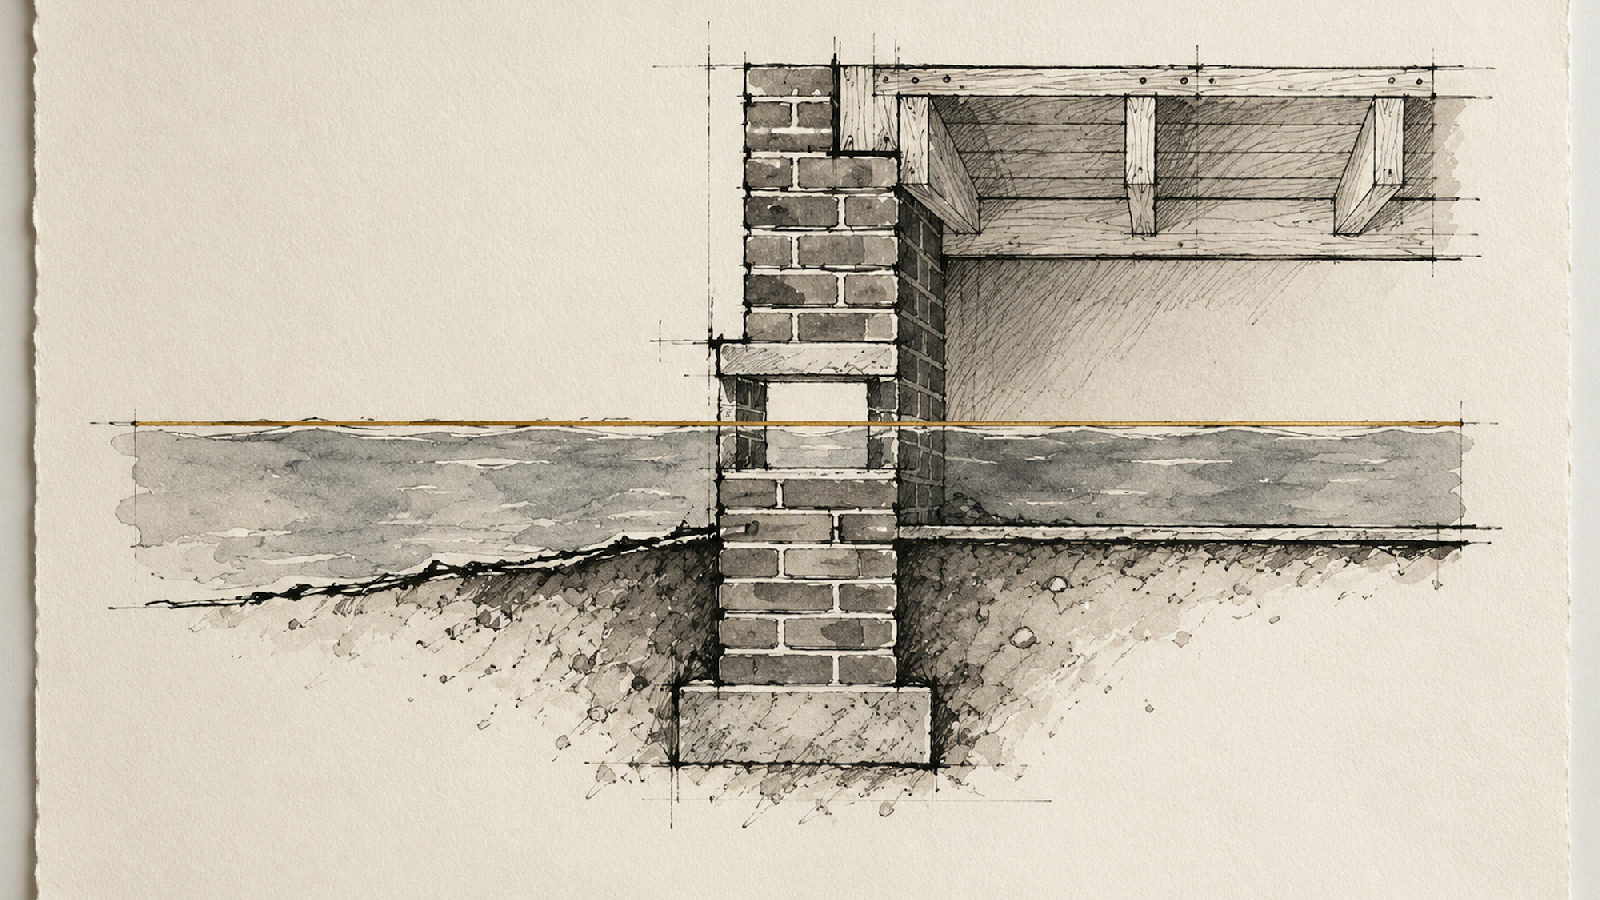
Flood Vents in Masonry Walls, Done Right
In a flood zone, water will find a way in. The question is whether it moves through the wall on your terms or on its own. Flood vents in masonry walls let rising water enter and exit an enclosed space at grade, equalizing pressure so the wall itself is not pushed apart. Done well, flood vents masonry work respects the original brick, the mortar, and the way the wall breathes. Done poorly, it leaves you with cracked jambs, spalling brick, and a mortar joint that reads wrong against 150 years of hand-struck lime.
What a Flood Vent Actually Does
A flood vent is an engineered opening that allows floodwater to pass through a foundation or enclosure wall. The purpose is hydrostatic pressure relief. When water rises against a solid wall, the pressure difference between the wet side and the dry side can be enough to shift, crack, or collapse masonry. A properly placed vent lets water in before that pressure builds, and lets it out as the flood recedes.
Vents are typically required in enclosed areas below the design flood elevation. The specifics depend on the flood zone, the enclosure use, and the local floodplain administrator’s determination. Site conditions decide the details.
Cutting an Opening Without Wrecking the Wall
An old Charleston brick wall is not a modern CMU wall. The units are soft-fired. The mortar is often lime-based, with low compressive strength by design and high vapor permeability. Cut it wrong and you telegraph damage far beyond the opening.
A material-correct approach looks like this:
- Survey the coursing. Locate the opening on a bed joint and a head joint pattern that minimizes cut bricks.
- Score by hand where possible. Aggressive saw work vibrates loose adjacent joints and can fracture soft brick faces.
- Install a lintel sized for the load path above. In a bearing wall, this is not optional, and it is not a place for a light steel angle chosen by eye.
- Rebuild the jambs with salvaged brick from the cut, laid to match the original bond.
- Repoint the perimeter with a mortar that matches the original in strength, color, and mortar profile.
Skip any of these steps and the vent becomes the weak point in the wall.
Mortar Choice Around the Vent
This is where most flood vent installations in historic masonry go wrong. A modern Portland-rich mortar packed against soft historic brick will trap moisture behind the harder joint. The brick face fails before the mortar does. You end up with spalled arris lines and a dark stain that will not clean off.
The correct approach uses a lime-based mortar compatible with the surrounding wall. That means matching binder ratios, aggregate, and color, and allowing a proper lime cure before the wall sees a full wetting cycle. Breathability matters here. The wall needs to release moisture after a flood event, not hold it against the brick.
For deeper background on matching historic mortars and joint profiles, see our work on historic brick repointing in Charleston.
Flashing, Drainage, and the Dry Side
The vent itself is a manufactured unit, usually a louvered or float-activated frame. Installation details that matter:
- Set the frame plumb and square in the rough opening, with a compressible sealant that does not bond aggressively to soft brick.
- Flash the head so water sheeting down the wall face does not enter the frame from above.
- Confirm the interior side handles moisture movement. If the vent opens into a finished space, the finishes on the dry side need to tolerate wetting and drying.
- Keep the vent clear at grade. Landscaping and hardscape often block vents within a year of installation.
Why This Matters in Charleston
Charleston sits at the intersection of tidal flooding, storm surge, and heavy rain events. Many of our masonry walls were built long before flood zones were mapped. The brick is soft. The mortar is lime. The foundations move slightly with the seasons. Adding a flood vent to a wall like this is not a matter of cutting a hole and caulking a frame.
It is a masonry problem first and a flood problem second. Get the masonry wrong and the vent accelerates the very damage it was meant to prevent. Get it right and the wall performs during a flood event without losing its character or its integrity.
The Lowcountry climate also punishes shortcuts. High humidity, salt air, and repeated wet-dry cycling expose any mismatch in mortar strength or vapor permeability within a few seasons.
When to Call a Specialist
Consider bringing in a masonry specialist when:
- The wall is historic, load-bearing, or both.
- The existing mortar is lime-based or you are not sure what it is.
- The opening falls near a corner, a window jamb, or an existing crack.
- The wall shows prior repointing in a mortar that looks harder or grayer than the original.
- You are working under a flood elevation certificate or a permit that specifies vent count and net open area.
An architecture-trained builder can coordinate the structural, waterproofing, and preservation questions before the first cut is made. That coordination is usually cheaper than the repair that follows a rushed installation.
Request a Project Review
If you are planning flood vent work in a masonry wall, or repairing a vent installation that has already caused damage, request a project review through our historic brick repointing services. We will walk the wall, assess the mortar, and outline a material-correct approach.